Learn more
PanoPosts adapts one wide or 360° photo to wherever you want to post it. For Facebook, Google Photos, Flickr, Kuula, Google Street View, and Google Maps Place it embeds GPano — a small block of metadata tags those viewers all read to recognize a JPEG as a panorama. For Instagram — which has no native panorama viewer — it slices the image into a swipeable carousel instead.
For everyone
Plain-language tour of what the editor does, real-world tips for getting your panorama from PanoPosts to Facebook in one piece, and how to handle photos that aren't perfectly pano-shaped.
What you can do in the editor
PanoPosts isn't just a metadata writer — it's a full editor for getting a wide or 360° photo into the shape each platform expects. Here's what's waiting once you drop an image in.
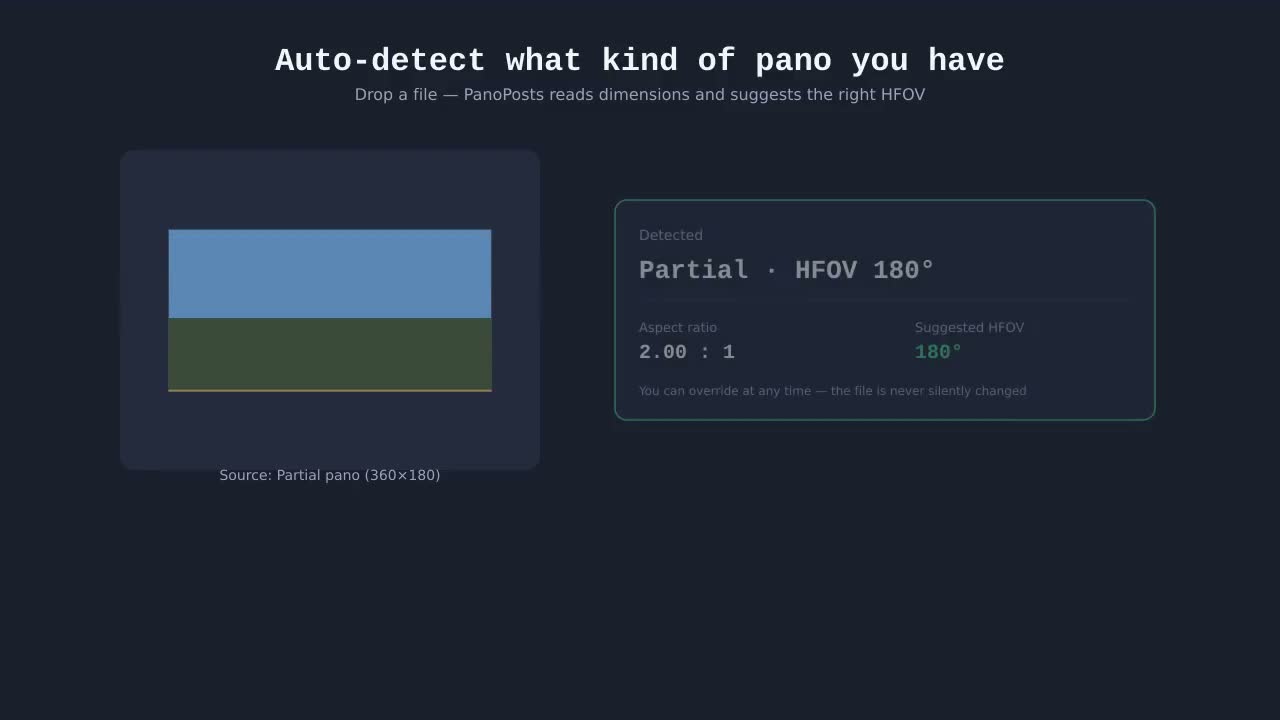
Auto-detect what kind of pano you have
Drop a photo and PanoPosts reads its dimensions to guess full 360° vs partial pano, and suggests a horizontal field of view (HFOV) that Facebook will accept. You can override the guess at any time — it never silently changes what your image actually contains.
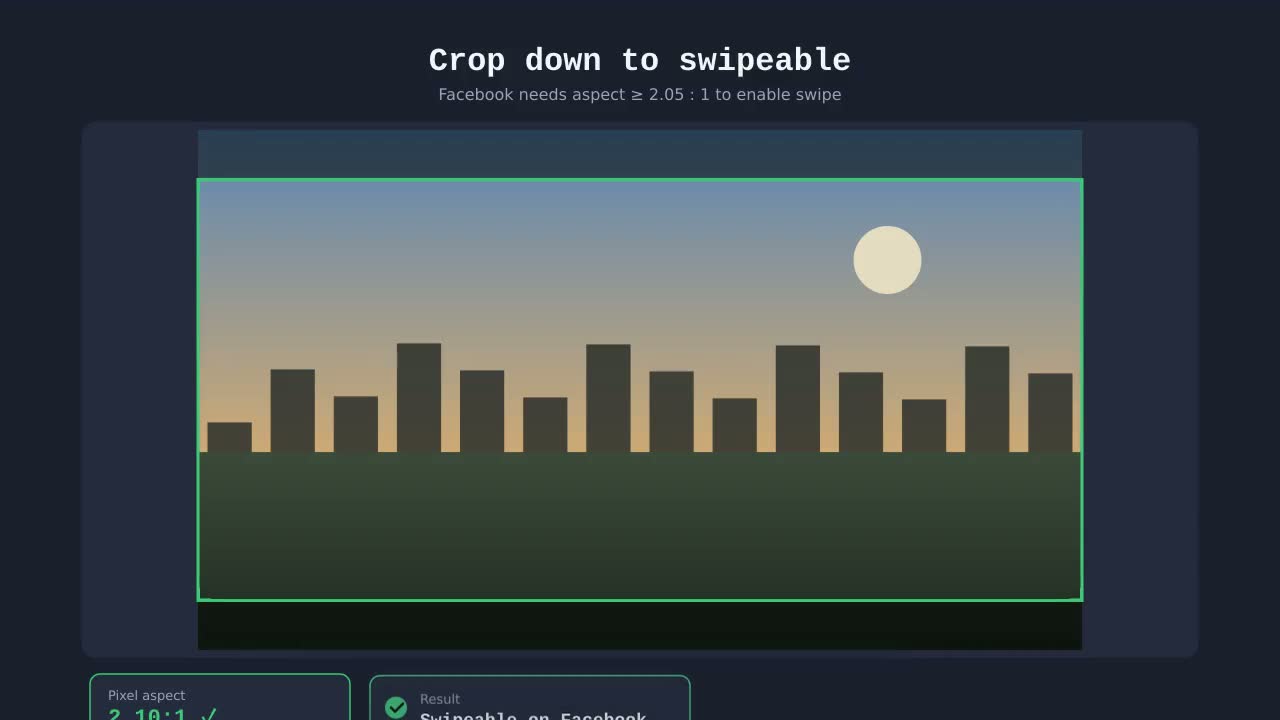
Crop down to a swipeable strip
A locked-aspect crop overlay lets you carve a 2.05:1+ panorama out of a 4:3 deck shot or a tall photosphere. For full-360 sources you can also choose how the crop is reprojected — cylindrical (straight horizons), rectilinear (straight everything, like a regular photo), or a raw equirectangular slice.
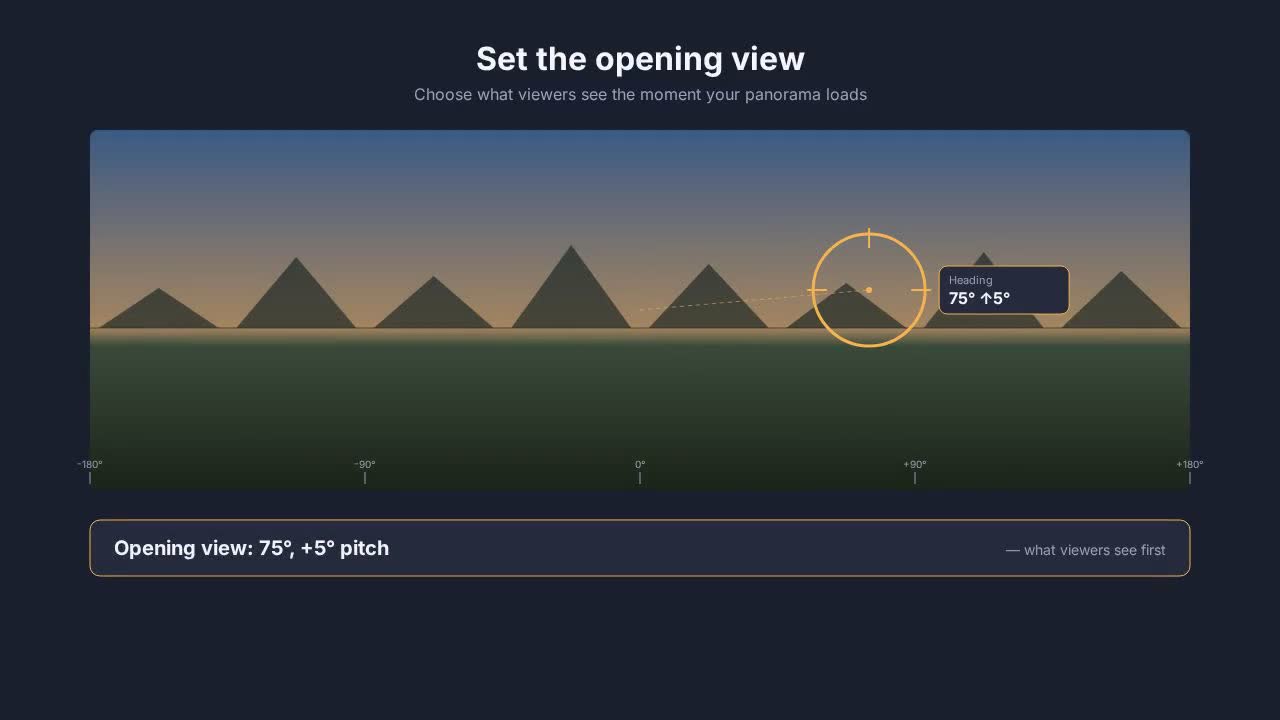
Set the opening view by dragging
Drag the live Facebook-style preview to choose where the viewer opens. One-click presets cover Front, Back, Left edge, Right edge, Look up and Look down. A reachable-range guard stops you from setting an offset Facebook would clip back to the edge.
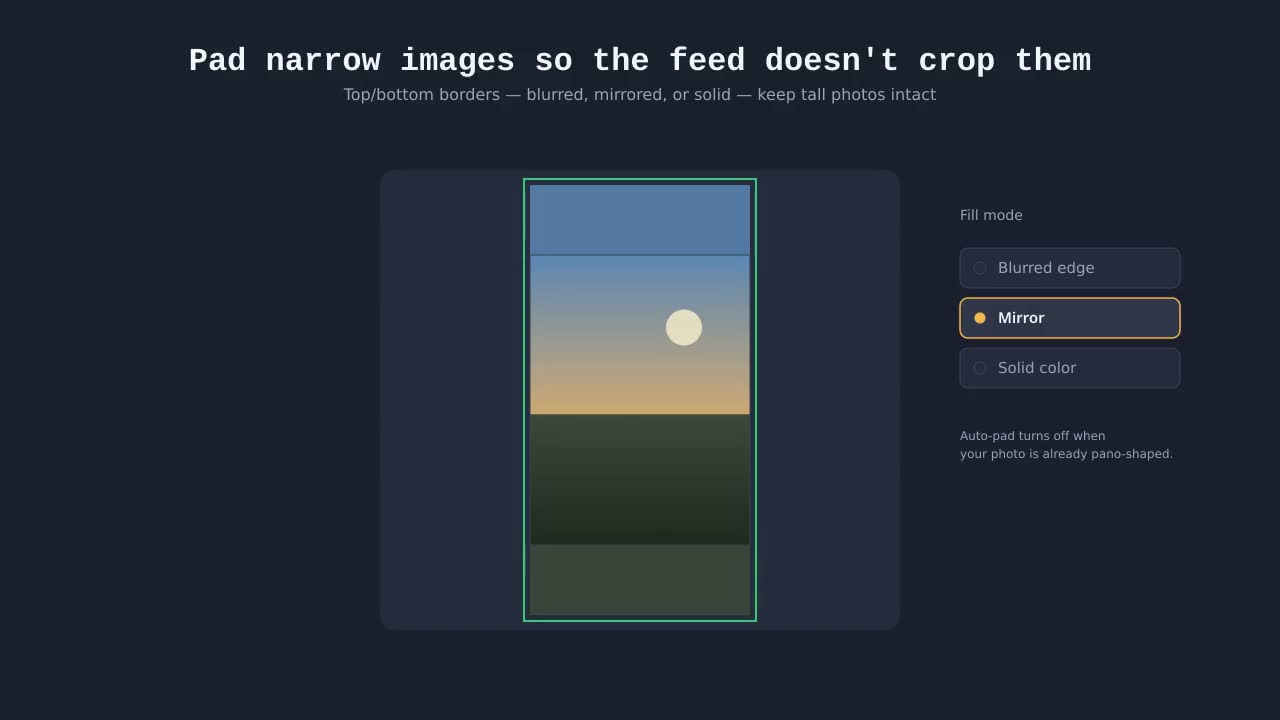
Pad narrow images so the feed doesn't crop them
For images Facebook would otherwise center-crop in feed, add top/bottom borders with a blurred edge, mirror, solid color, or custom fill. Auto-pad turns itself off when your image is already pano-shaped, because borders break Facebook's panorama detector.
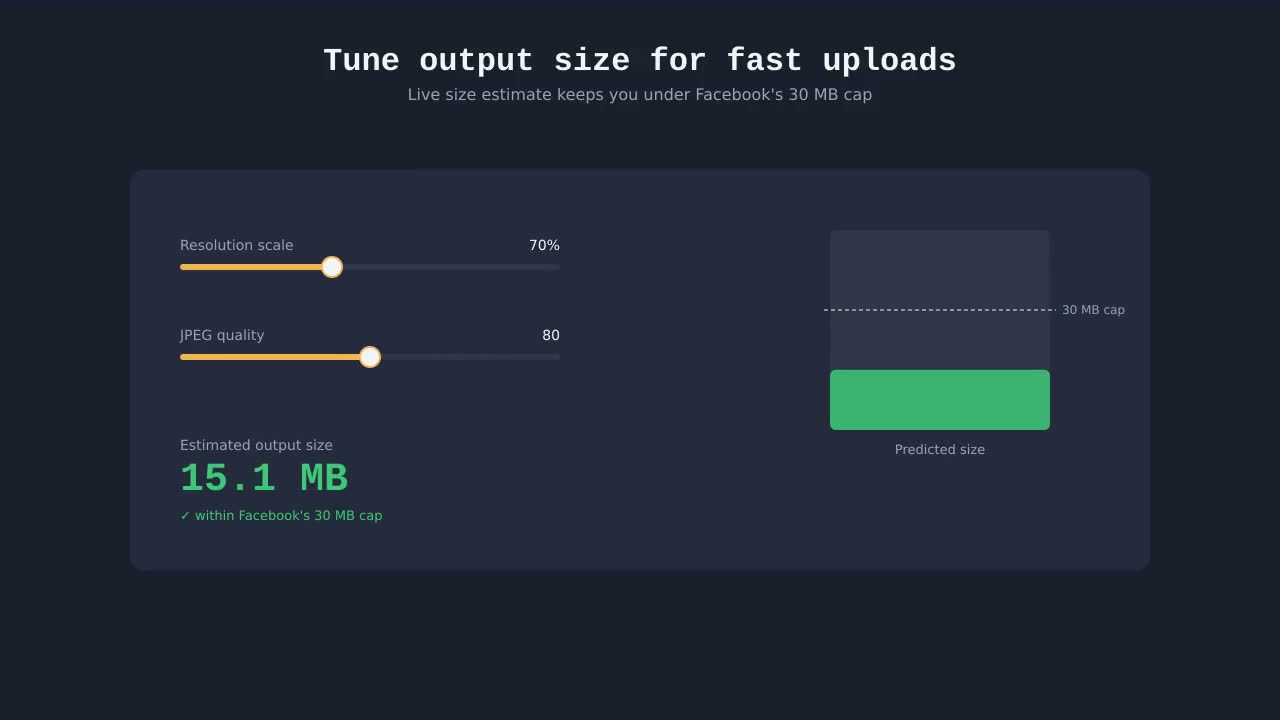
Tune output size for fast uploads
Resolution scale and JPEG quality sliders show an estimated file size in real time, so you can stay under Facebook's 30 MB cap without guesswork. Defaults to 92 quality at full resolution — already great for most images.
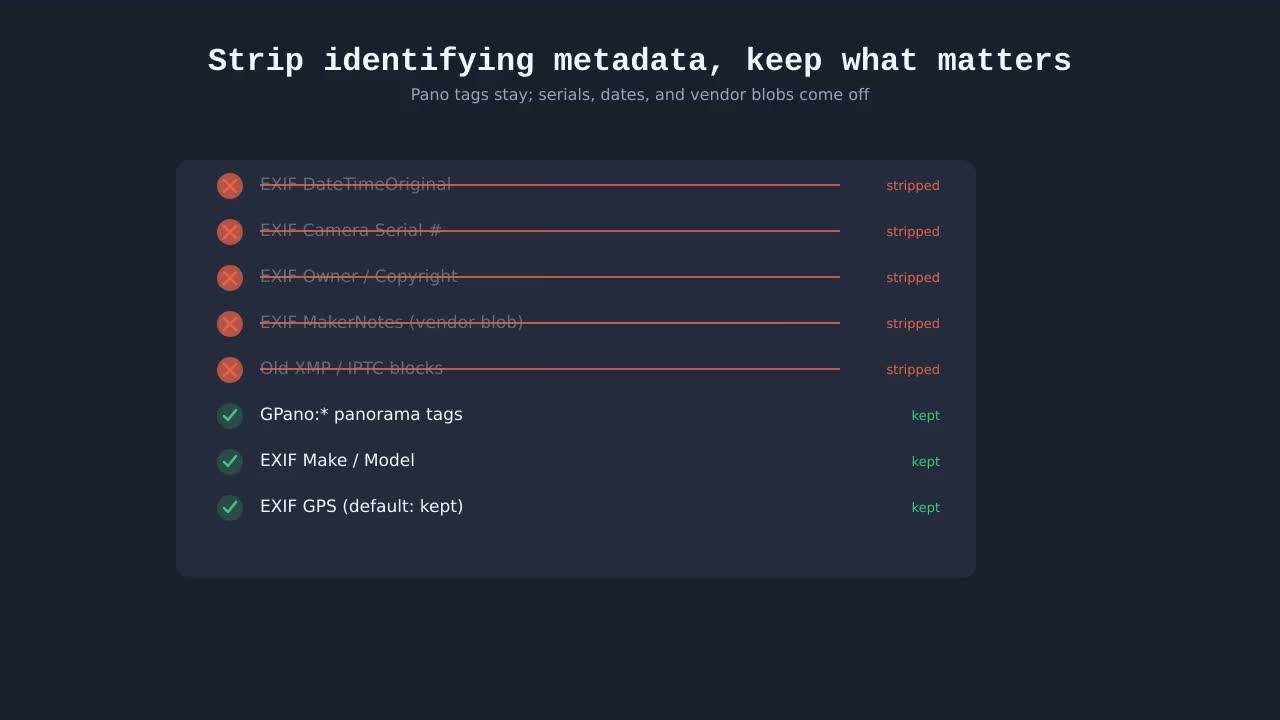
Strip identifying metadata, keep what matters
Optionally remove dates, device serials, owner/copyright fields, MakerNotes, and old XMP/IPTC blocks while still writing the panorama tags Facebook needs. GPS is preserved by default with a separate toggle to strip it too.
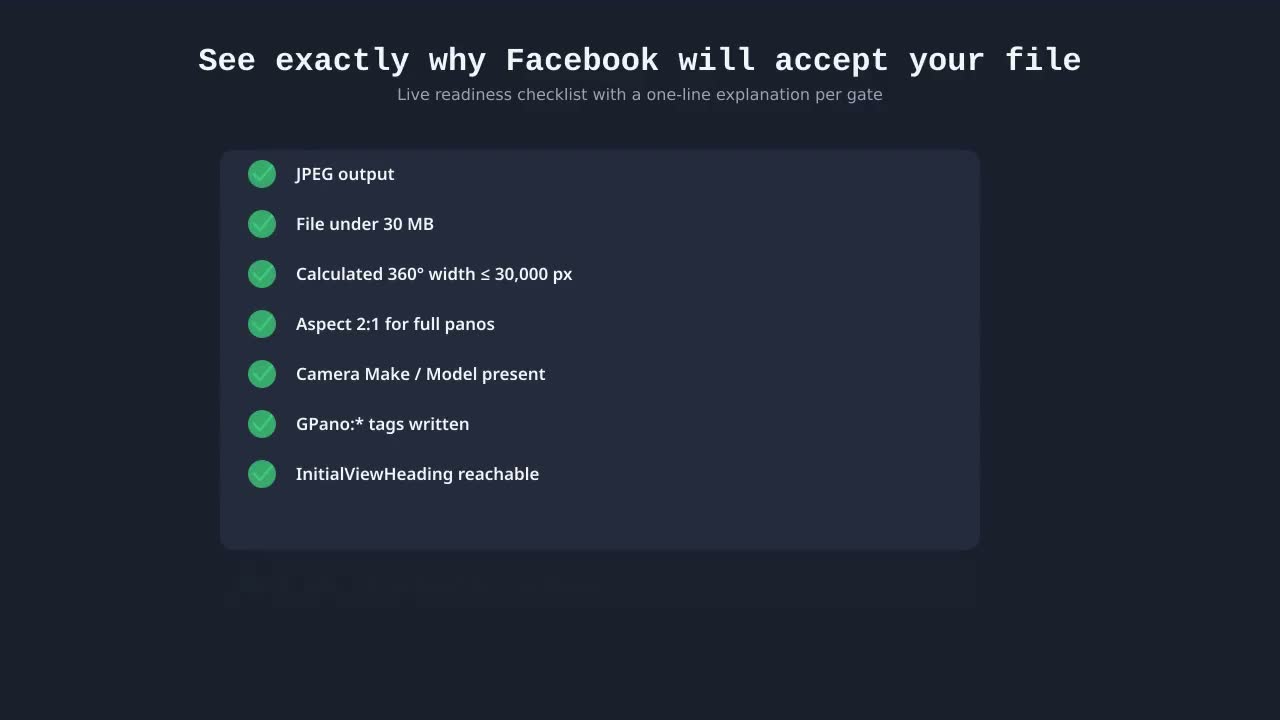
See exactly why Facebook will accept (or reject) your file
A live readiness checklist shows every Facebook gate — JPEG output, file under 30 MB, calculated 360° width within 30,000 px, 2:1 aspect for full panos, camera Make/Model present, GPano tags written — with pass/fail marks and a one-line explanation for each.
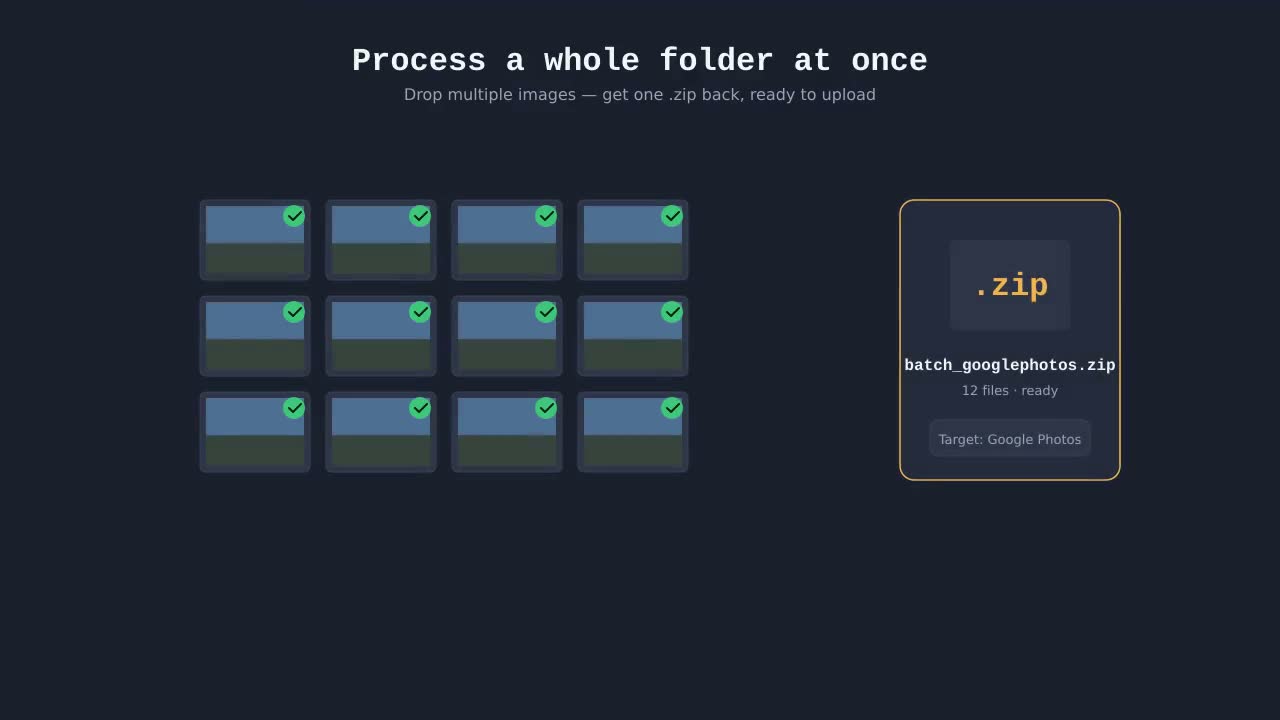
Process a whole folder at once
Drop multiple images and PanoPosts opens its batch processor instead of the single-image editor. Pick a target platform once, get a single .zip back with every export ready to upload.
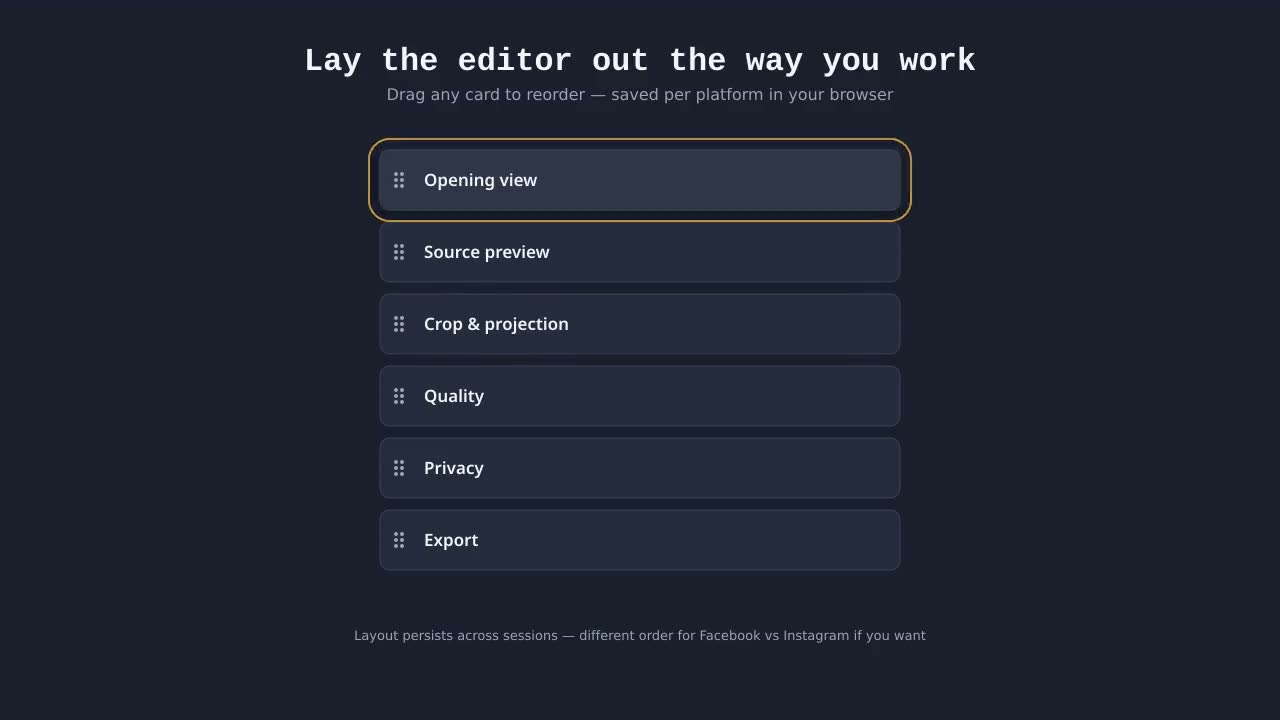
Lay the editor out the way you work
Every editor card is drag-to-reorder. Your layout is saved per platform in your browser, so the controls you use most are always at the top.
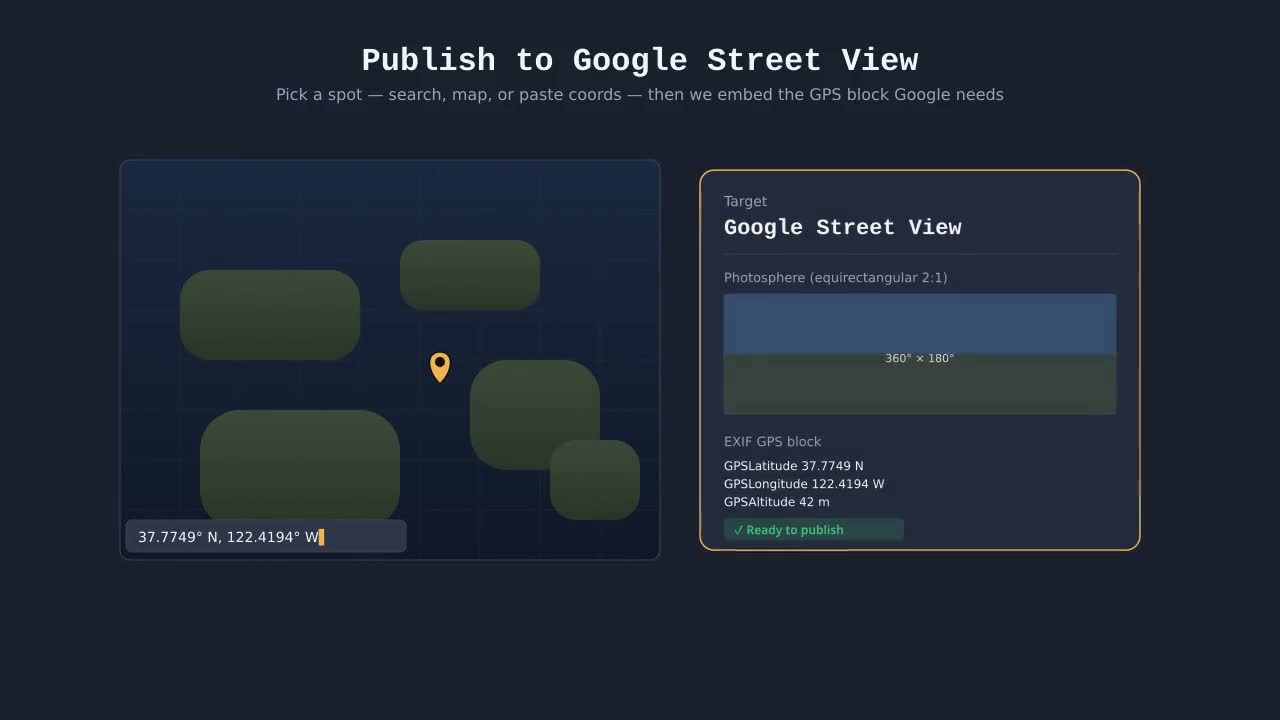
Publish to Google Street View
Pick a target of "Street View" and PanoPosts validates your full 360° × 180° photosphere, embeds the GPS block Google requires, and lets you set the location three ways: search an address, drop a pin on the map, or paste coordinates. The destinations panel walks through the Street View Publish API now that Street View Studio no longer accepts photo uploads.
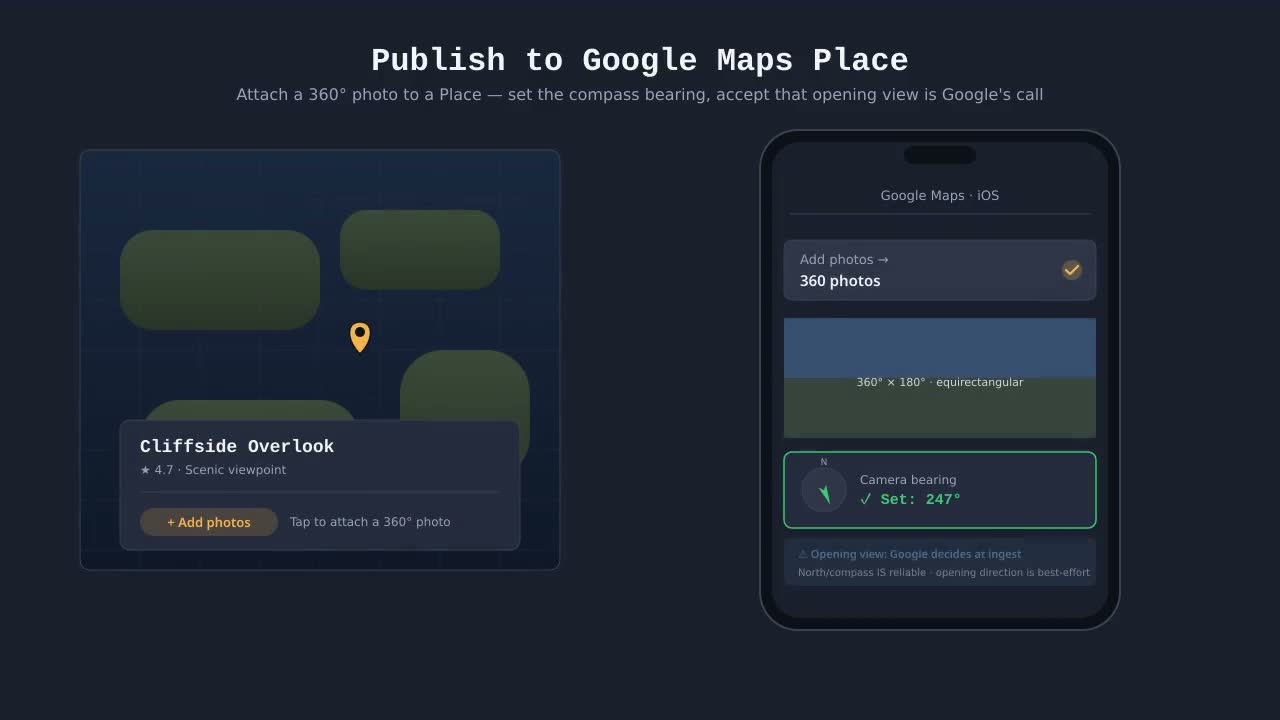
Publish to Google Maps Place
Pick a target of "Google Maps Place" and PanoPosts validates your full 360° photosphere, requires you to set the camera bearing on the compass dock (true-North on the in-app compass depends on it), and walks you through uploading via the Google Maps mobile app. Note: Google overrides the opening view direction at ingest, so frame your shot with true-North as a reasonable starting view.
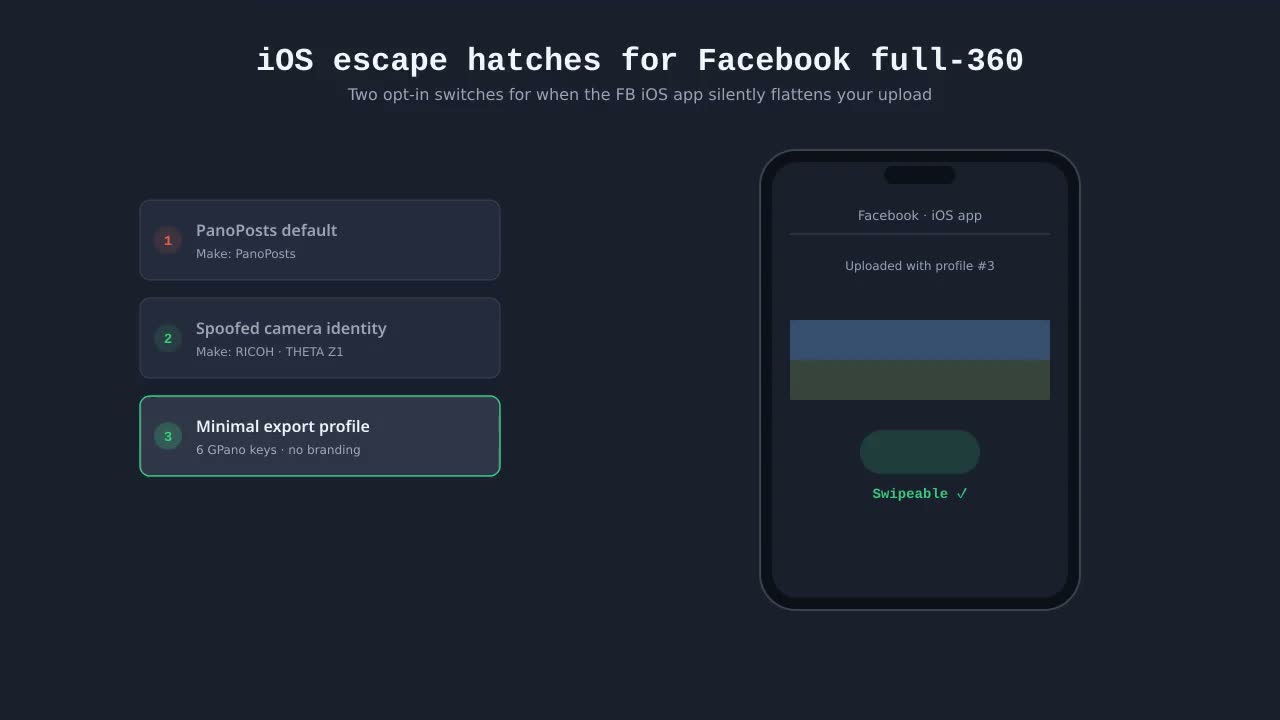
iOS escape hatches for Facebook full-360
When the Facebook iOS app silently flattens an upload, two opt-in switches give you alternate paths. Camera identity lets you spoof a well-known consumer 360 camera (Ricoh Theta Z1, Insta360 X3/X4, GoPro Max, or a custom Make/Model) so FB iOS treats the file like a recognized device. The minimal export profile strips PanoPosts branding and emits only the six core GPano keys, mimicking the smallest known-good iOS upload signature — at the cost of giving up initial-view direction control.
Best practices
A few quirks worth knowing — most are about iPhone and iPad, where the OS and the Facebook app sometimes strip the panorama tag without telling you.
Posting from an iPhone or iPad
Two things on iOS quietly break swipeable panoramas. First, Apple's Photos app strips the GPano metadata when you Save Image — so a pano that worked yesterday will post flat tomorrow if it went through the camera roll. Second, the Facebook iOS app re-encodes very large 360s on upload and drops the tag in the process. Safer paths: upload directly from PanoPosts to facebook.com in Safari (skip Photos entirely), or save into the Files app instead of Photos. PanoPosts already caps full-360 exports at 8192 px wide on iOS so Facebook's app accepts them as-is.
Posting more than one panorama in the same post
Facebook's iOS share extension refuses photo collections that contain panoramas — try to share three 360s at once and they'll all post as flat photos. Two workarounds: use the editor's “Share one by one” option, which hands each pano over individually so they all land as true 360s; or compose the post on facebook.com in a desktop browser, where multi-pano albums work cleanly.
Keep the panorama tag intact end-to-end
Every time a panorama passes through another app, the GPano tag is at risk. Don't open the export in Photos and re-save it. Don't run it through another editor before uploading. If you need to store the file before posting, use Files (iOS) or Downloads (desktop), not the Photos library — those preserve the JPEG byte-for-byte.
Making a 16:9 (or other wide non-pano) photo swipeable
Facebook only treats an upload as a swipeable panorama when two pixel-level gates are met: the image must be at least 2.05:1 wide-to-tall, AND at least 4096 px wide. A standard 16:9 frame (1.78:1) sits just under the aspect gate, and most phone/drone photos at 4:3 or 3:2 sit well under it. Drop the photo into PanoPosts and the editor will surface a two-button choice: crop horizontally to a 2.05:1+ strip (best for landscapes — you keep full width, lose top/bottom), or post as a flat photo with no GPano tag (best when the subject fills the frame). If your source is below 4096 px wide, upscale or shoot wider next time — Facebook will silently flatten anything narrower even with perfect metadata. Tall/portrait shots that can't reasonably crop wide are better posted as an Instagram carousel instead.
Recovering from awkward source images
Most photos won't drop in already-perfect for Facebook. Here's how PanoPosts handles the three cases you'll actually hit.
1. Narrow strip below 2.05:1
Stitched panoramas often land at 2:1 or even narrower because the stitcher trimmed top and bottom. Auto-pad adds blurred top/bottom borders to push the aspect over the gate, or you can crop horizontally if your subject lives in the middle. Both paths preserve the original horizontal content.
2. Regular non-pano photos (4:3, 16:9, etc.)
A regular photo — 4:3, 3:2, 16:9, square, or portrait — fails the aspect gate by a wide margin. The two-button below-gate UI lets you crop down to a swipeable strip (great for landscapes), or post as a flat photo with no GPano metadata (great for portraits and groups). For very-non-pano shots the editor also nudges you toward the Instagram carousel — its 1:1 and 4:5 slides handle portrait/square content natively.
3. Full-360 photosphere
PanoPosts auto-detects 2:1 photospheres and switches to full-360 mode. There's one quirk worth knowing: Facebook's full-360 viewer treats 0° as the back of the image, so the editor adds a +180° offset to your chosen "Front" heading on export. Your subject ends up facing forward in the viewer — without this offset, every photosphere would open looking the wrong way.
Technical details
How Facebook decides what's a panorama, what GPano actually is, and every metadata tag PanoPosts writes. Skim or skip — you don't need any of this to use the app.
Will Facebook accept my photo? The two gates
Facebook's panorama detector applies two independent checks before it shows the swipe viewer. PanoPosts surfaces both inside the editor so you always know which one (if either) is failing.
Gate 1 — Declared horizontal arc
Your image must declare it covers at least 100° horizontally. If it doesn't, Facebook treats the JPEG as a regular photo. The editor offers a one-click "Set HFOV to 120°" fix when this is the only thing standing in your way — but only suggests it; it never silently bumps the value, because lying to Facebook about what your image contains breaks the alignment between the swipe arc and the actual scene.
Gate 2 — Pixel aspect ratio
Your image must also be at least 2.05:1 wide. Even with a generous HFOV declaration, a 4:3 photo still gets rejected because the pixel shape doesn't look like a panorama. When this gate fails, PanoPosts shows a two-button choice instead of the normal download: "Crop for swipeable" (opens the crop overlay locked to 2.05:1) or "Download as flat photo" (skips GPano entirely so Facebook treats it as a regular post).
How PanoPosts routes your image through the gates
                  HFOV ≥ 100°
                       │
   ┌──── pass ─────────┴─────── fail ────┐
   ▼                                     ▼
Aspect ≥ 2.05:1                Editor suggests
   │                           "Set HFOV to 120°"
   ├── pass → Swipeable        (only if your image
   │                            actually covers it)
   └── fail → Below-gate UI:
              • Crop for swipeable
              • Download as flat photo
Why we don't auto-fix either gate: PanoPosts will never silently change what your image declares. The HFOV bump and the crop are both opt-in clicks because they're real edits to either the metadata or the pixels — they should be your call, not ours.
Facebook's hard numbers, in one place
Detector floor: at least 4096 px wide for any swipeable pano (and at least 600 px tall for partials). Full-360 declared width cap: 30,000 px. Facebook iOS app re-encode threshold: PanoPosts caps full-360 exports at 8192 px wide on iOS so the tag survives upload. File size: 30 MB max. The readiness checklist enforces all of these at export time.
What Facebook checks
- • File is a JPEG.
- • EXIF contains a camera Make and Model.
- • XMP contains GPano tags with
ProjectionType=equirectangular. - • Pixel aspect ratio matches the declared coverage — 2:1 for full 360°, or at least 2.05:1 with width ≥ 4096 px for partial swipeable panos.
- • File size and dimensions are within Facebook's upload limits.
The partial-pano trick
A wide stitched photo like 12135×1538 isn't a full sphere — but if you tell Facebook it's a cropped region of an imaginary full sphere, the swipe viewer kicks in. PanoPosts computes that imaginary sphere from the horizontal field of view you choose, then writes the crop offsets so the viewer pans across exactly the visible region.
Instagram carousel
Instagram has no native panorama viewer, so PanoPosts takes a different approach: it slices your wide image into 1:1 or 4:5 slides and packs them into a zip you upload as a multi-image post. Followers swipe through the slides like panning across the original. No GPano tags are written for Instagram — they'd be ignored anyway.
Publishing to Google Street View
Google Street View has the strictest requirements of any destination PanoPosts supports — and the most quirks once your photo goes live. Here's what to expect, why we make the choices we do, and where Google overrides things you might assume are under your control.
Compass heading and the opening view
Set North in the editor tells Google which direction is true north in your photo, and the opening direction picker chooses where the viewer first looks. Both values are written into the GPS and GPano blocks, but Google Street View ignores GPano:InitialViewHeadingDegrees for contributor uploads — it always opens looking at the middle column of the image. To make your chosen opening direction land on Google, PanoPosts physically wrap-shifts the equirectangular pixels so your subject ends up at that middle column before export. The viewer opens looking where you wanted, and the wrap-around point of the image moves to the back of the view, where it's least noticeable. (Maps Place uses a different shift: it puts true-North at the middle column instead — see the Maps Place section below.)
GPS coordinates are mandatory
Google Street View rejects any panorama without GPS coordinates. PanoPosts writes EXIF GPSLatitude / GPSLongitude (with N/S/E/W references), GPSAltitude when available, and GPSImgDirection matching your true-north heading. You can set the location three ways: search an address (Nominatim), drop a pin on the embedded map, or paste decimal coordinates. There is no way to upload to Street View without a location — Google uses these coordinates to place your panorama on the map.
Capture date is set by Google, not by you
Street View always stamps your panorama with the upload date — never the capture date — for contributor uploads through the Maps app or the Publish API's single-photo path. PanoPosts preserves EXIF DateTimeOriginal and writes GPSDateStamp, but Google ignores them for the public timestamp shown on the photo card. The only ways to backdate are Street View Studio sequences from supported 360 cameras (video, not single photos) or full Publish API access with photo.captureTime — neither is available through the standard Add photo flow. Plan your uploads accordingly: if the date matters, post promptly after capture.
Source image requirements
Google Street View accepts only full 360° × 180° equirectangular photospheres — no partial panos, no flat photos, no cropped strips. The image must have a 2:1 pixel aspect ratio and Google's recommended minimum is 4096 px wide (PanoPosts validates this and warns if your source is below the floor). The editor only enables the Street View target when the source qualifies. Google Maps Place has the same full‑360 restriction (and the editor disables that tab too for non-360 sources). For partial panos, use the Facebook target or post as an Instagram carousel instead.
What survives, what gets stripped
Google reads GPS, GPano:ProjectionType, GPano:UsePanoramaViewer, GPano:PoseHeadingDegrees, and the cropped/full sphere dimensions. It ignores GPano:InitialView* (which is why we pixel-roll instead), GPano:FirstPhotoDate (date is set at upload), most EXIF fields beyond GPS, and any custom XMP namespaces — including PanoPosts' own diagnostic tags. Camera Make/Model are read for attribution in the photo card but don't affect acceptance.
Where to actually upload
Street View Studio's web UI no longer accepts single 360° photo uploads — only video sequences from supported cameras. For one-off panoramas you have three live paths: the Google Maps mobile app's Add photo flow (tap a place, then Add photos > 360 photos), the Street View Publish API (requires an approved app and OAuth), or third-party hosts that mirror to Street View. The destinations panel inside the editor links to each.
iOS-specific gotcha
iOS Photos strips GPano XMP when you Save Image from another app, which silently breaks Street View uploads. Always upload directly from PanoPosts (via the share sheet or Files) rather than re-saving to Photos first. If you must go through Photos, verify the GPano tags survived using a metadata inspector before uploading.
Publishing to Google Maps Place
Google Maps Place photos attach to an existing Place on Google Maps (the “Add photos” button on a business or location listing). They open in a non-navigable 360° viewer with a compass — viewers can spin the photo but can't walk to the next one like Street View. The trade-offs vs. Street View are different enough to warrant their own section.
What a Maps Place 360 photo is
Unlike Street View, Maps Place photos don't appear on the blue-line layer and don't link to neighboring panoramas. They live attached to one specific Place. The viewer is simpler: spin to look around, with a small compass that always points to true-North. Most Maps Place photos in the wild are uploaded through the Google Maps mobile app — there's no desktop upload UI for them.
Source image requirements (full 360° only)
Maps Place only accepts full 360° × 180° equirectangular panoramas — same restriction as Street View. A partial / 180° pano will appear as a flat photo on Google Maps with no compass and no spinning, regardless of metadata. The editor disables the Maps Place tab for non-360 sources and shows a “Full 360° only” hint. For partial panos you want embedded in a 360 viewer, use the Other (GPano) target instead.
Compass bearing is required
Maps Place's compass needs to know which way is true-North in your photo, otherwise it points the wrong direction and your viewers get disoriented. The editor enforces this: until you set the camera bearing in the compass dock, the export is blocked and the dock shows a red “● Required” banner. Once you set it, the dock switches to a green “✓ Set: NNN°” chip. You can read the bearing off a digital compass on-site, copy it from EXIF if your camera recorded it, or estimate it from the map.
Opening view is at Google's mercy
You can pick an opening direction in the editor, and PanoPosts writes it into the file — but Google Maps overrides it at ingest. In practice the viewer tends to open looking roughly opposite of true-North (toward the back of the photo), regardless of what we request. This isn't a PanoPosts bug; the leading pro Street View tools (Pano2VR is the canonical reference) document the same behavior. Bottom line: the compass IS reliable on Maps Place; opening direction is best-effort. Frame your shot so that south of true-North is a reasonable starting view.
GPS is optional (the Place provides it)
Unlike Street View, Maps Place doesn't require GPS in the file — Google inherits the coordinates from the Place the photo is attached to. PanoPosts will still embed GPS if you set a location, which is useful for your own records and for re-using the file on other platforms.
Capture date — same caveat as Street View
Google stamps Maps Place photos with the upload date, not the EXIF DateTimeOriginal. Plan accordingly: if the date matters, post promptly after capture.
Where to upload
Open the Google Maps mobile app, navigate to the Place, tap “Add photos” → “360 photos”, and pick the JPEG PanoPosts produced. There's no desktop web UI for this — Maps Place uploads happen through the mobile app. The destinations panel inside the editor includes the direct link.
Google re-levels your panorama (so does Street View)
Both Maps Place and Street View re-level uploaded panoramas at ingest using their own algorithms. That means the Advanced Pose pitch and roll values PanoPosts writes into GPano:PosePitchDegrees / PoseRollDegrees are typically ignored on Google. They're still useful if you re-export the same file to a non-Google viewer (Pannellum, Marzipano, Kuula, Facebook), but on Google destinations consider them cosmetic.
What is GPano?
GPano isn't a separate file format, app, or viewer — it's a Google-defined XMP metadata namespace. Think of it as a small block of tags PanoPosts embeds inside your JPEG's existing metadata that says "this is a panorama, here's its shape, and here's where the viewer should open."
All GPano tags share the same namespace URL — http://ns.google.com/photos/1.0/panorama/ — which is the lingua franca that Facebook, Google Photos, Flickr, Kuula, Google Street View, and Google Maps Place all read to decide whether to render a swipe/pan viewer instead of a flat image.
GPano XMP doesn't travel alone. PanoPosts also writes EXIF Make/Model (so platforms that demand a camera identity accept the file) and, for Street View exports, an EXIF GPS block (mandatory — Google rejects panoramas without coordinates). Together those three pieces — GPano XMP, EXIF identity, EXIF GPS — form the full "panorama signature" the glossary below catalogs.
Tag glossary
Every tag PanoPosts writes, grouped by purpose. Tag names are the literal attribute names you'd see in a metadata inspector like ExifTool.
Identification (always written)
- GPano:UsePanoramaViewer
- 'True' tells viewers to open the swipe/pan UI instead of showing a flat image. Without this, Facebook treats the JPEG as an ordinary photo.
- GPano:ProjectionType
- Always 'equirectangular' — tells viewers the image uses a sphere/strip projection.
Geometry (always written)
- GPano:FullPanoWidthPixels / FullPanoHeightPixels
- Dimensions of the imaginary full 360° sphere. For partial panos this is larger than your actual image.
- GPano:CroppedAreaImageWidthPixels / HeightPixels
- The dimensions of your actual image — what part of the full sphere it occupies.
- GPano:CroppedAreaLeftPixels / TopPixels
- Where the visible strip is positioned inside the imaginary full sphere. Centered by default.
Opening view (always written)
- GPano:PoseHeadingDegrees
- The camera's compass heading in degrees (0–360°), wrapped from any signed UI value. Written as the actual scene heading — full-360 viewers that need a different opening direction read InitialViewHeadingDegrees instead.
- GPano:InitialViewHeadingDegrees
- The heading the viewer opens to. For partial panos it's a signed offset around the crop center wrapped into 0..360 (e.g. −1° → 359°). For full-360 PanoPosts adds a +180° offset because Facebook's full-360 viewer treats 0° as the back of the image — without this every photosphere would open looking the wrong way.
- GPano:InitialHorizontalFOVDegrees
- How zoomed-in the viewer opens, in degrees. PanoPosts caps this at 75° because that's Facebook's maximum opening field of view.
Pitch (full 360° only — omitted on partials)
- GPano:PosePitchDegrees
- The camera's vertical tilt in degrees, clamped to ±90°. Written for full 360° exports only.
- GPano:InitialViewPitchDegrees
- The vertical tilt the viewer opens to, clamped to ±90°. Written for full 360° exports only.
EXIF identity (always written; injected if missing)
- EXIF Make / Model
- Facebook and other platforms sometimes refuse panoramas that lack camera identity. PanoPosts injects 'PanoPosts' / 'Multi-platform' when the source file has neither.
EXIF GPS (required by Google for Street View; optional for Maps Place)
- EXIF GPSLatitude / GPSLongitude (+ Refs)
- Latitude and longitude in degrees-minutes-seconds rationals plus N/S/E/W reference. Required for Street View — Google places your panorama on the map using these.
- EXIF GPSAltitude / GPSDateStamp / GPSTimeStamp
- Optional height above/below sea level (1mm precision) and capture date/time. PanoPosts writes them when known; Street View accepts panoramas without them.
PanoPosts attribution (always written)
- x:xmptk
- Toolkit attribute on the XMP root, set to 'PanoPosts'. Lets a metadata inspector see which tool produced the file.
- GPano:FirstPhotoDate
- ISO timestamp of when PanoPosts prepared this JPEG. Useful for distinguishing re-exports from original captures.
- GPano:SourcePhotosCount
- Always '1' — PanoPosts treats your input as a single source image rather than a stitch of multiple shots.